> This article has expired. Versions of Xliff Tool after 5.0 no longer need to use shortcuts, but can automatically call Apple's API for translation.
Using ML Translation
This document is applicable to both iOS and macOS versions. Screenshots are for macOS version.
Steps
- Add the Shortcut
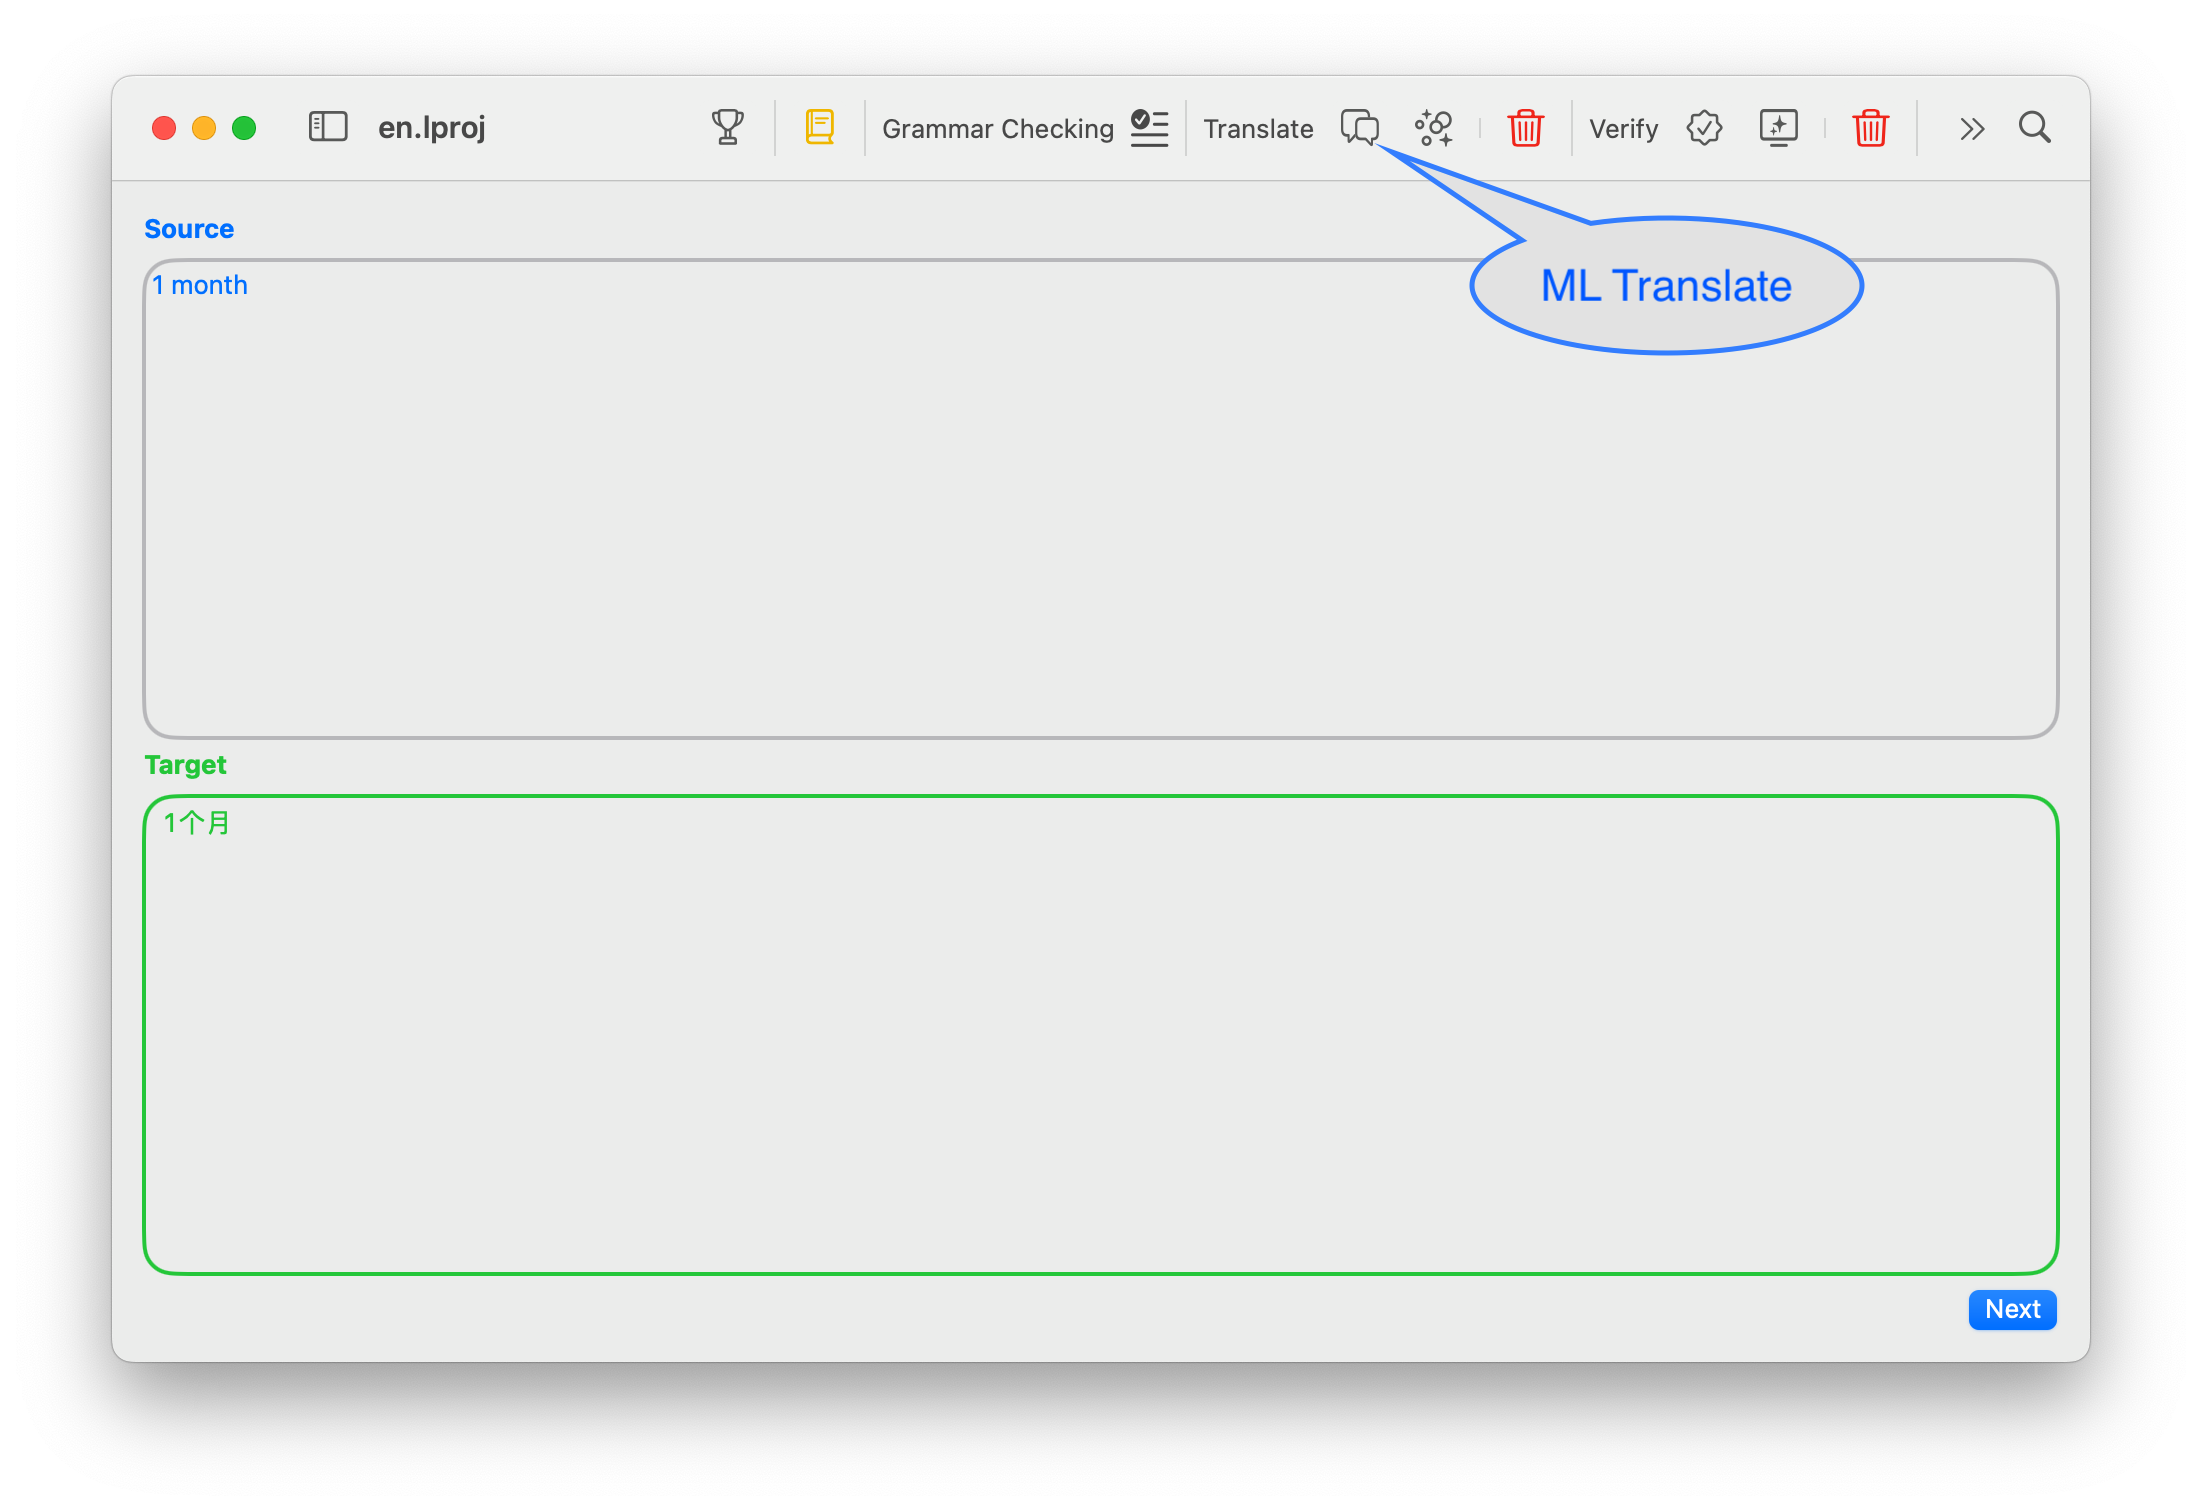
- In Xliff Tool, select ML Translate.
- Translate with the Shortcut Key
- On macOS, you can use the default Fn+Return key.
- For iOS, there are multiple ways to invoke the shortcut.
It's important to note that the shortcut is implemented through the clipboard. On iOS, apps need to ask for permission each time they read from the clipboard. Therefore, if you encounter an app freeze or unresponsive situation, it's not that the app has a problem, but rather the system's pop-up asking for permission to use the clipboard did not correctly display on top.
Solution: Use the app switch function to reselect Xliff Tool, which will then display the correct pop-up, allowing the app to access normally.
A better approach is to search for Xliff in system settings and change the "Paste from other apps" setting from Ask to Allow.
1. Add the Shortcut
To use the shortcut for translation, first, you need to install the required shortcut.
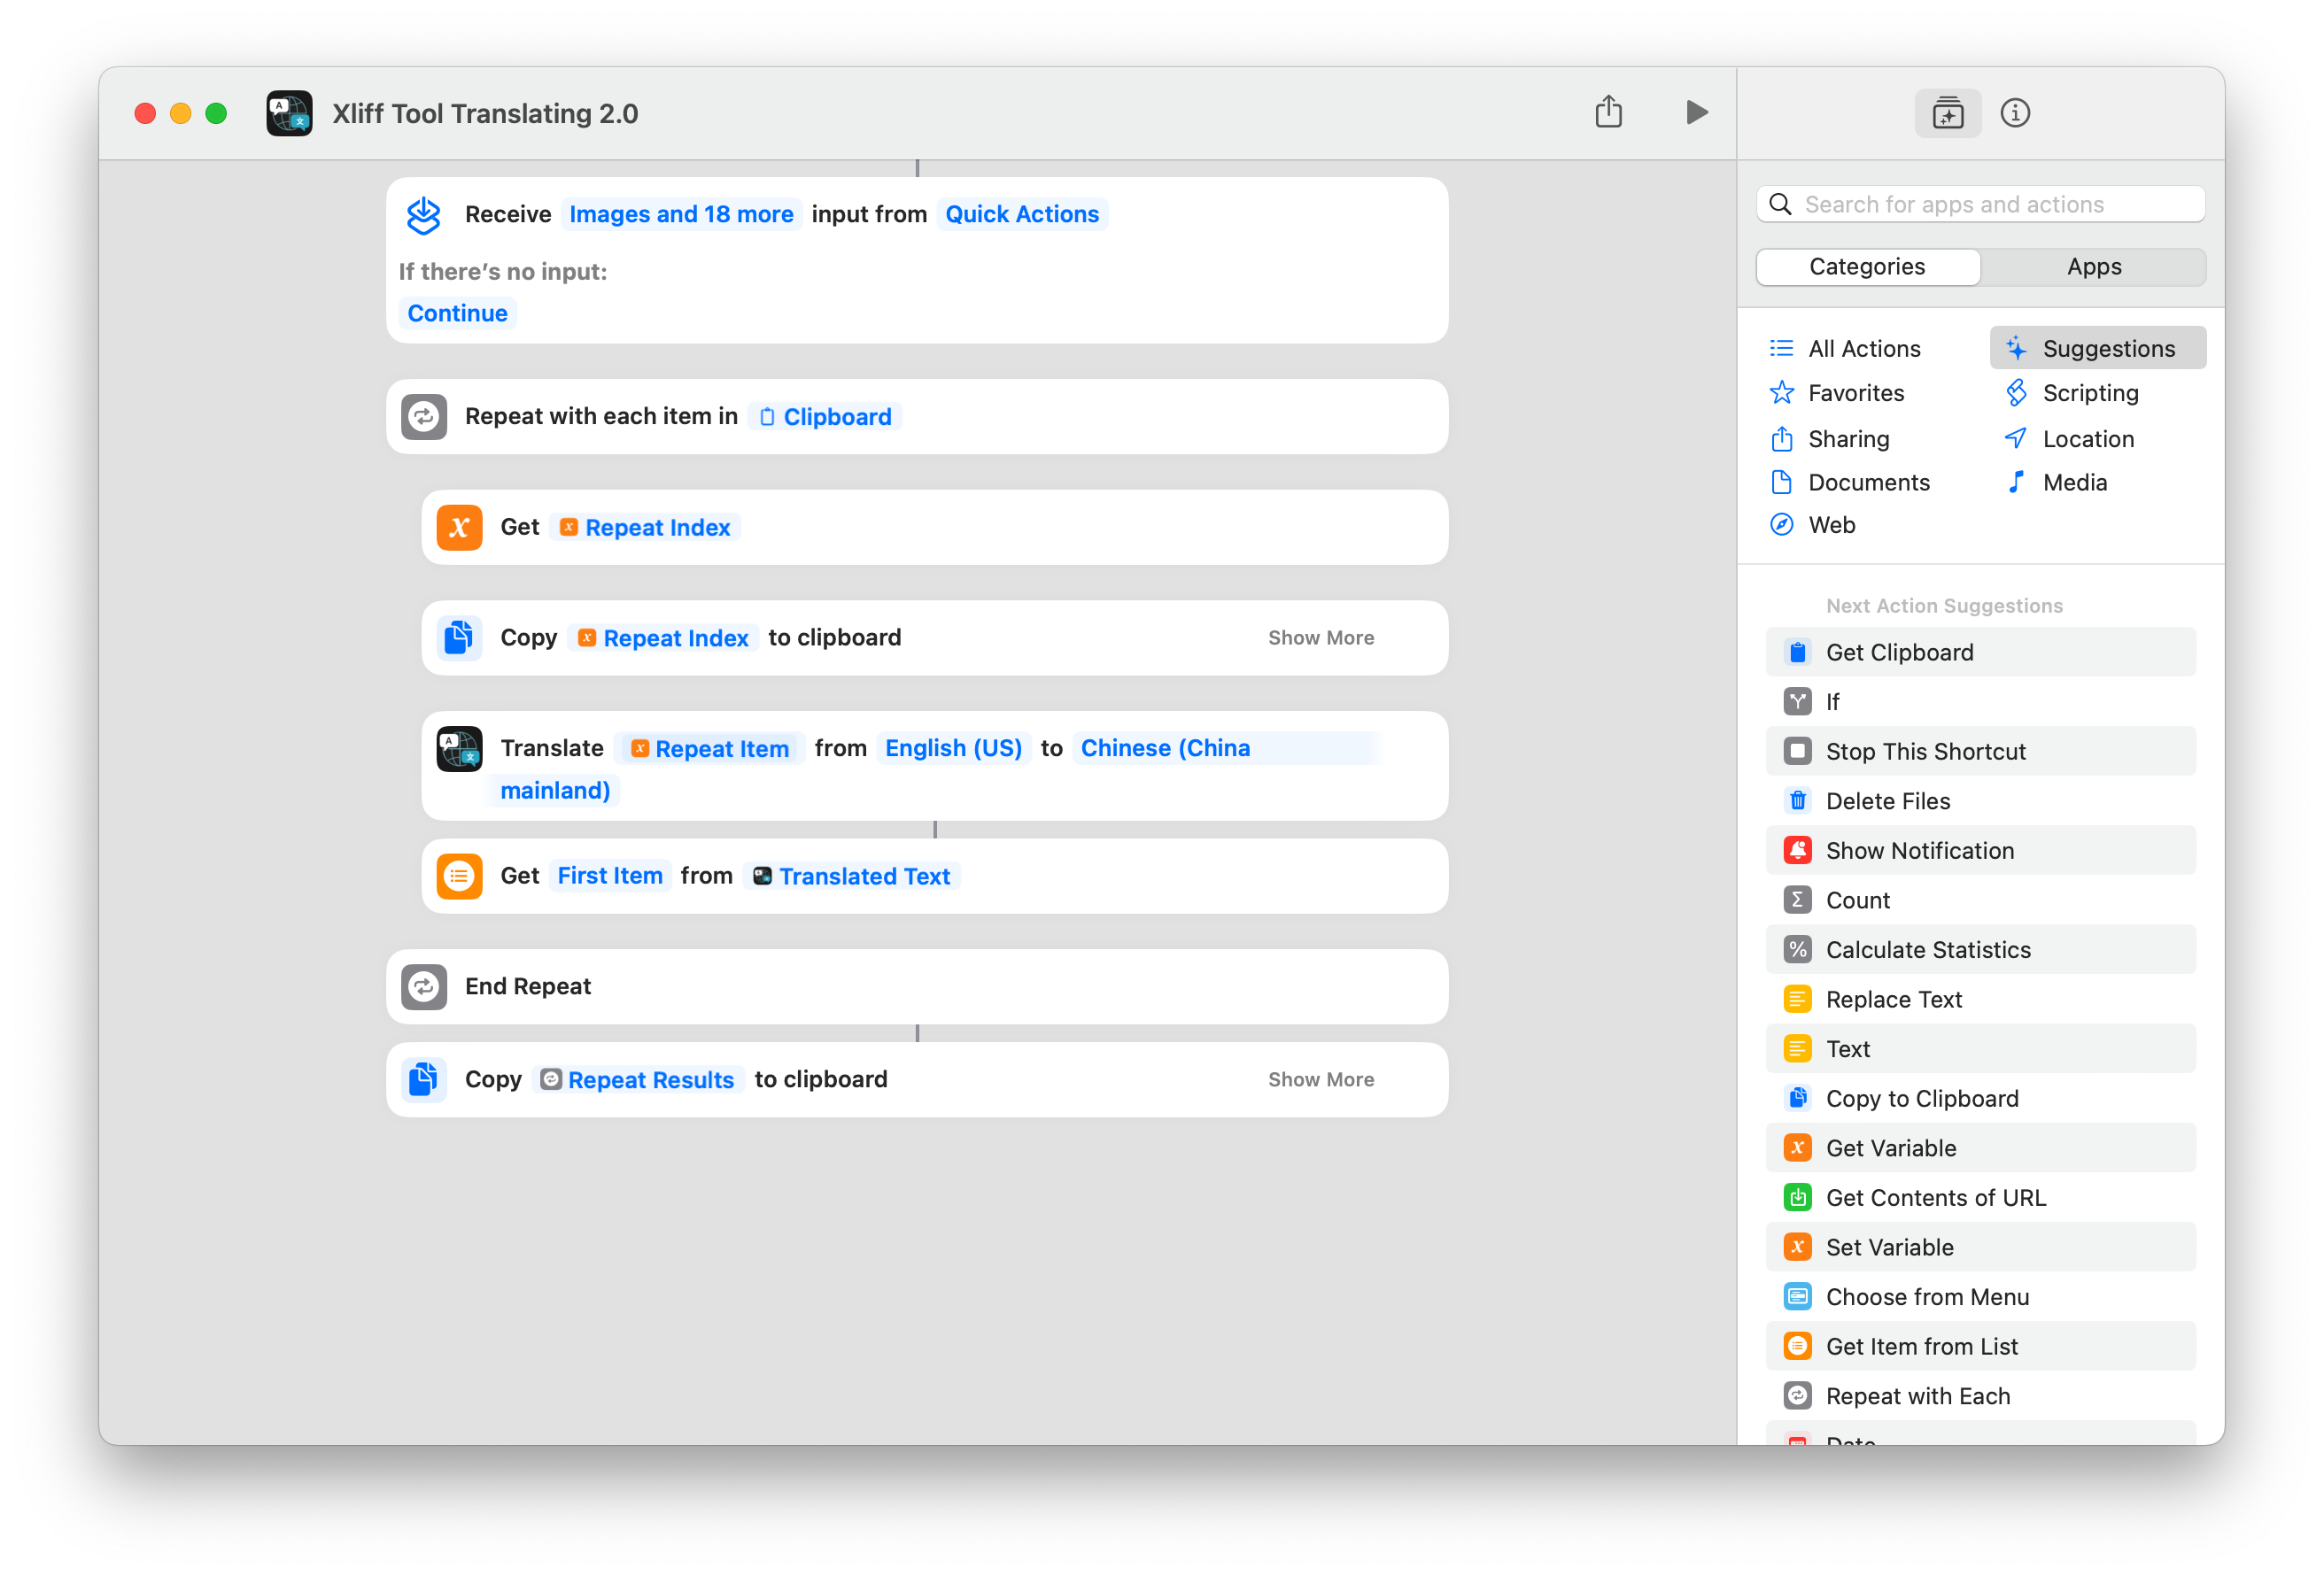
Instructions for the Shortcut:
- Get Input
- Translate to Simplified Chinese
- If you need to translate to another language, change it to your target language.
- Write the translated content back to the clipboard.
2. Select ML Translation in Xliff Tool.
3. Translate with the Shortcut Key
You can set it to other shortcut keys.
Common Troubleshootings
"May not be a supported language" prompt:
Sometimes, the second step of translation prompts a "May not be a supported language" error. This error can be attempted to be resolved by:
- Change the "Detected Language" to a specific language. For example, if you are translating English to Chinese, you can change it to English. This can also slightly improve the translation speed.
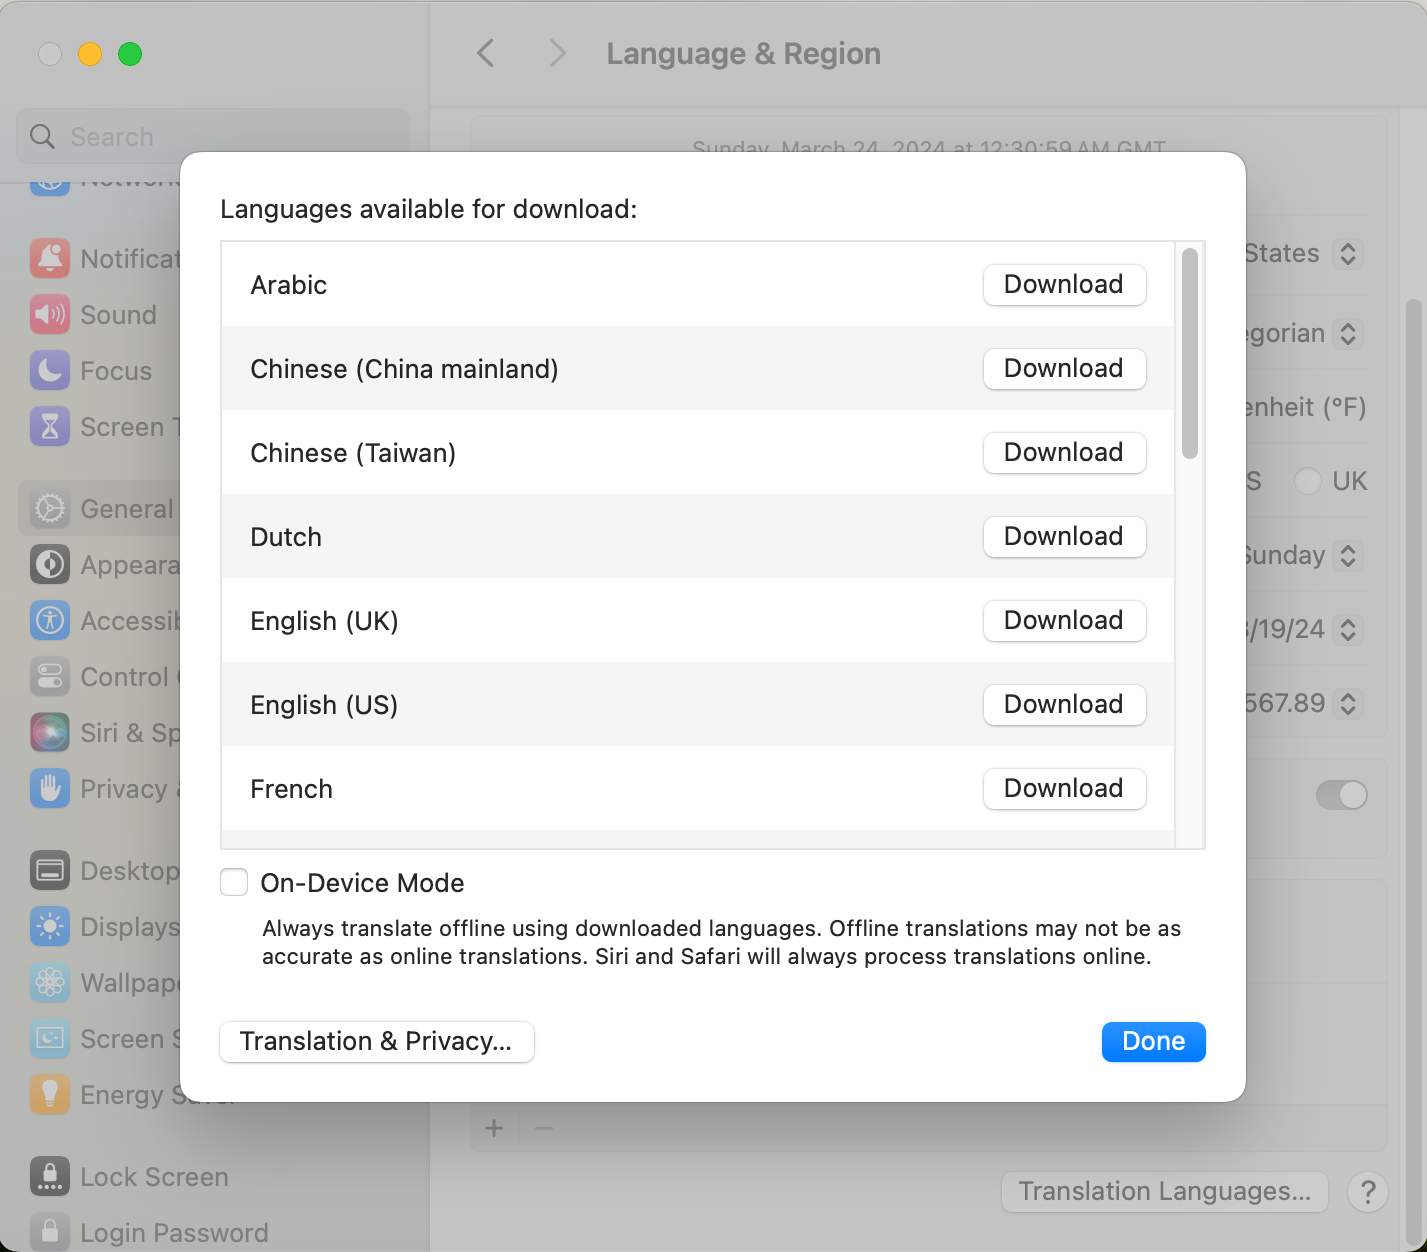
- If after changing, it prompts a "Remote Server" error, then it's not your issue but an Apple server issue. In this case, you can resolve it by downloading the translation package.
Download Translation Package
- Open "System Settings...", General, Language & Region, scroll to the bottom, and click on "Translation Languages..." at the bottom right corner.
- Click on the corresponding language packs, for example, if I often use English to Chinese translation, I would select English (United States), English (United Kingdom), and Chinese (Mandarin - Mainland China) for download.
After the download is complete, if there is an issue with the remote server, it will启用 local translation (enable local translation). If you want to use local translation directly, you can select "Device Mode," but the accuracy of the translation will be slightly worse.
Other Possible Issues
This method uses the clipboard for data transfer, so it may be interrupted by other apps. If interference occurs, you can first choose to close the window and then reopen it to try the translation again.
Some regions may have issues directly accessing Apple's servers, you can consider adding rules to allow Apple's servers to be accessed through a proxy/VPN.
Additionally, in the latest macOS 14.3, the translation language packs mentioned above may not display completely. This is because Apple has changed to only display the languages you use. You can display the corresponding language packs by adding new languages to the primary language.
The last issue seems resolved by macOS 14.4.
Using LLM for Translation
Finally, you can also use LLM for translation. Compared to ML translation, LLM translation may sometimes have larger deviations and requires you to proofread more carefully.
For LLM installation, please refer to the "Local Large Language Model" at the top. For specific usage, please refer to "Best Practices ".
Copyright © 2017 ParusSoft.com